

Click here to download the (Download Surgeon V4. User Guide PDF)
Download Surgeon 4has three main modules. Unlike earlier Version which had for modules, the OS Downloader module has been removed and functionality for those sites has been rolled into the Sniffer Downloader. Version 4 we have made many significant changes and enhancements. These changes increase user convenience and expand the functionality of what the program can do.

One of the major differences with DS4 is that it uses a built-in browser. This browser is the primary means for navigating to a website, playing a video and detecting it. When a video is detected DS4 will place a small green “Download” graphic on the video. This allows you to see and know exactly what video you are downloading.

In addition to this new “browser” approach, DS4 includes a direct URL approach similar to what was found in DS3. In the upper right-hand corner of the browser, among several icons, there is a Chain or Link icon. When clicked this opens a small form field into which you can copy and paste the URL of an audio or video and then click the associated “Go” button and DS4 will attempt to find and download the A/V file associated with this URL.
While the green download button is the primary method for finding and downloading A/V files, the Link or Go button approach is a valuable secondary approach where the main method doesn’t work. Lastly, when neither of these work, the SC Recorder is the final, and fail-safe approach for being able to grab a copy of a file.
This User Guide walks through each module explaining the features and functionalities. Users should also avail themselves of the Training Videos for this new Version, which are a companion resource, and can be found on our website. There are also links in the Help Button of the product for both of these resources.

1. YouTube Downloader
A. Default Style - The YouTube Downloader has been completely overhauled which has greatly increased its functionality. Before we review how this revised module works, please note that if you’d like to use the old module, the way it worked in Version 3, you can right click on the YT Downloader button and you’ll see an option to select DS3 Old Style. The new, browser style, is set as the default. This default setting can be changed in the Options Button on the far right.
B. New Browser Style - New Browser Style – The new browser style approach used in the YT Downloader was implemented for two reasons. The first is that it is simply more convenient as you’ll see once you start using it. The second reason is that, unlike the old DS3 style, by using a browser you can actually log-in to your YouTube account. Logging in is important to be able to access a series of functions that the old Version 3 could not do.
Assuming you have a YouTube account, the first thing you should do when you use the YT Downloader is to log in. Without doing this many of the new features in this module will not be available.
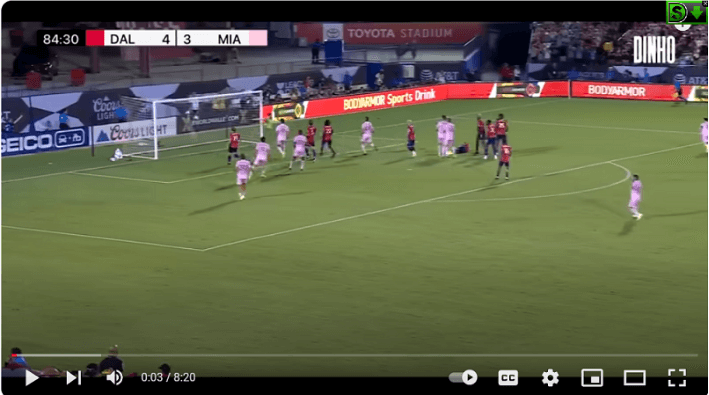
The new browser approach works as follows. Go to YouTube and click on a video to start it playing. Once the video starts to play, DS4 will place a small green graphic on the upper, right-hand side of the video as shown below.
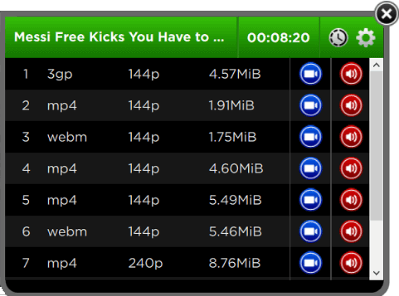
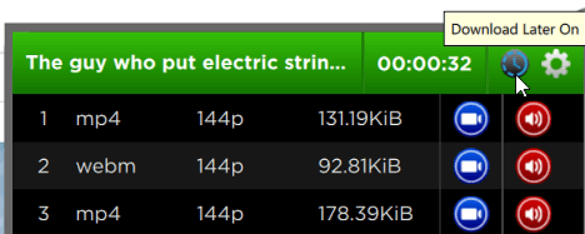
Once this graphic is clicked a dialog window will open as shown here. At the top of the dialog in the green area, from left to right you will see the 1) Video Name, 2) Duration, 3) Download Later Button and 4) Tools menu.
In the black body, you will see a list of the files available to download with specific details for each: File type, resolution, and file size.
C. Four Ways To Download
There are several different options for
downloading from
this dialog window.
C1. Click the blue video icon for a specific file. When you do this video will be downloaded immediately and saved in the default file location for DS4 files on your computer. The video will be saved using the same file format shown and video name shown in the dialog window.
C2. A second way is to click the Red Audio button. When you do this, thee video will be downloaded immediately and saved in the default file location for DS4 files on your computer. DS4 will save the video file, strip the audio from it, delete the video file and then convert the audio stream to an mp3 and save it with the video file name shown for this file. The default audio file format can be changes in the Options button of the program.
C3. A third way this can be download is to click the clock icon, in the upper right-hand corner which toggles on the “Download Later” option. Once that is on, clicking the blue video or red audio button will place that file in the que to be download at a later time. See the Download Later section of this User Guide for more details on the Download Later feature.
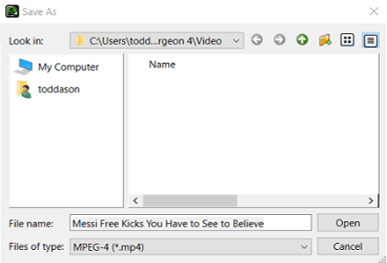
C4. The final way to download is to click and select a row in the black body of the dialog window. When you do, that row will be highlighted to show it is selected. After that, the next step is to again click either the Red or Blue, audio or video button on the right. This time, DS4 will open a standard Windows Dialog box, similar to the one shown here, from which you can modify the file name, the file type, and the download location
D. Download Progress Dialog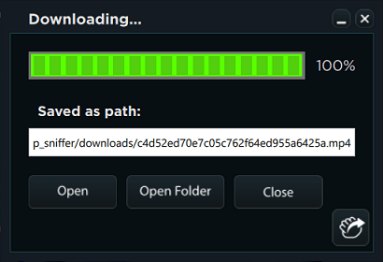 Once the download begins DS4 will show the following Download Progress dialog window.
Note that, in this window, you can see the path and the file name. Also note at the bottom, once downloading is completed that there are four buttons you can click:
Open: Clicking this Open button will open the file in your default application for the file type being downloaded, or if you have selected 1 of 3 TMJ Software programs (SS, VS, KS) in the Options Button, it will open the file in the program you designated in the option button.
Open Folder: This will open the folder on your computer which contains the file you have just downloaded.
Drag and Drop Icon: Also note the Drag/Drop graphic on the far, lower right. This can be clicked with the mouse and held down and then dragged to a different folder or location on your machine When doing this, you can also drag the icon onto an application that is open on your machine – which should then open this program.
E. Specialized YT Downloading Functions At the top and center of the YT Browser you will find seven green buttons as show to the right. When
selected a button will turn white indicating that function has been engaged. Users can click the button
a second time to return it to its off state or by clicking a different button the new selection will be
enabled and the previous one disabled. Each of these seven buttons is reviewed below.
At the top and center of the YT Browser you will find seven green buttons as show to the right. When
selected a button will turn white indicating that function has been engaged. Users can click the button
a second time to return it to its off state or by clicking a different button the new selection will be
enabled and the previous one disabled. Each of these seven buttons is reviewed below.
E1. The first button on the left is the Playlist Download Button. When a video is opened that is part of a playlist as indicated by the “list=PL” character found within the YT URL (See the example below and note again the part in the URL that has been highlighted) and this first button is clicked, DS4 will grab all of the videos in this playlist and display them in a dialog window as shown below.
https://www.youtube.com/watch?v=_QCt3UBTS1Y&list=PLlwfspJqZ126JHOY5rTkKCSAp2Ua907-v
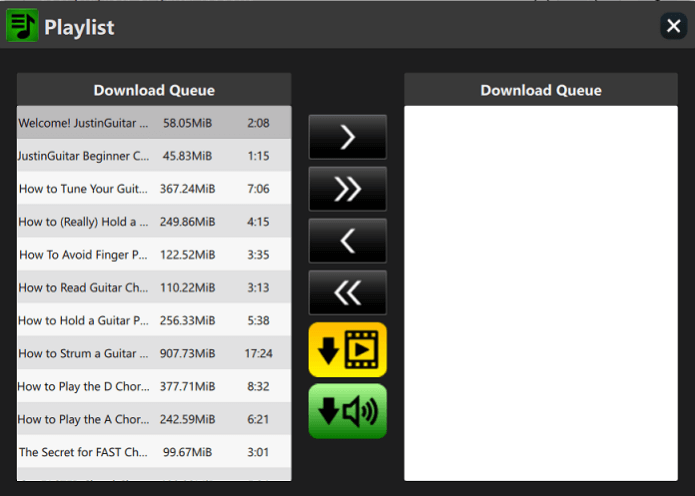
Next step in the process is to select one or more files on the left had side and move them to the download que on the right using the single arrow pointing right. To move them all without selecting any of them click the double arrow to the right
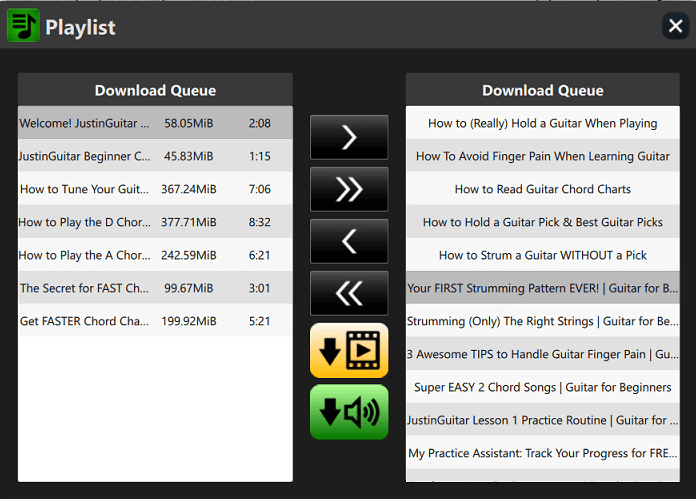
After this, select the yellow video download or green audio download button. DS4 will then download each of the files in the download que on the right. Video files will be saved as mp4 files. Audio files will be saved as mp3 files. These downloadrd files will be saved in the DS4 default folder location (unless changed via the Options Button) on your computer which is here
C:\Users\Your User Name\Documents\Download Surgeon 4\Video
C:\Users\ Your User Name \Documents\Download Surgeon 4\Audio
E2. Watch Later When browsing on YouTube, users have the ability
to click a “watch later” icon which appears on videos within YT. An example of that is shown here to
the immediate right. It is the graphic that looks like a clock in the upper right-hand corner. This
graphic typically can be seen only on a mouseover. In YT, when this button is clicked this video is
added to a watch later list.
When browsing on YouTube, users have the ability
to click a “watch later” icon which appears on videos within YT. An example of that is shown here to
the immediate right. It is the graphic that looks like a clock in the upper right-hand corner. This
graphic typically can be seen only on a mouseover. In YT, when this button is clicked this video is
added to a watch later list.

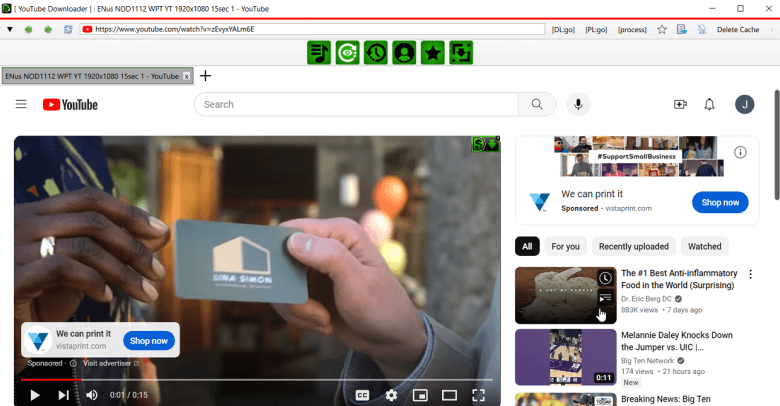
Below is a full page-view of Youtube and the location of the videos in the right hand column which on mouse-over reveals the watch later icon.
When a user is logged into their account and this green, Watch Later button is clicked, DS4 will automatically find the videos contained in your YT watch later que and load them into a dialog box as shown below
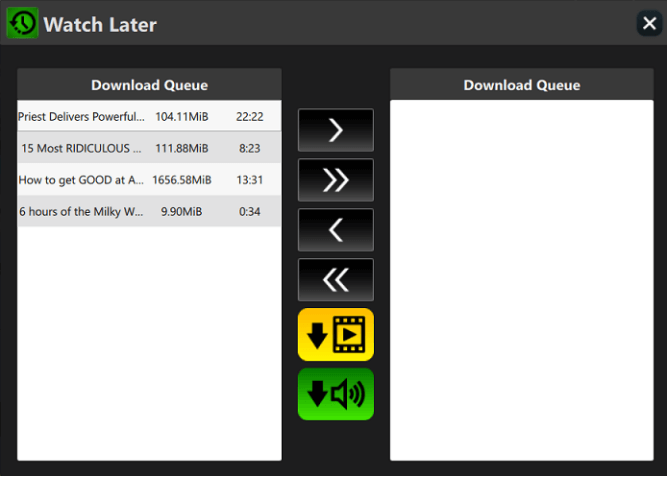
This is the same dialog used for the Playlist functionality and will be used for several additional Youtube module buttons including History, User Profile, and Favorites
The next step in the process is to select one or more files on the left had side and then move them to the download que on the right using the single arrow pointing right. To move them all without selecting any of them click the double arrow to the right.
Once you have selected the videos/files of interest and they have been moved to the right, either the Download Audio (green) or Download Video (yellow) button is clicked and then DS4 will download the selected files.
E3. Download Watched Video History
When a user is logged into their YouTube account, clicking the third green button from the left will
engage DS4 to find your YT “watched videos” history and load them into the same dialog window as
shown in the previous section. The instruction for navigating and using this dialog window are also
identical those found in the previous section.
 E4. The next button is for the Your User Profile (My YT Account).
When logged into
your account and this button is selected, DS4 will open the same dialog window shown previously and
populate ALL of the videos you have uploaded to your profile on the left side of this window.
Thereafter you will be able to select one or more of these videos using your mouse and the buttons
in the middle and move them to the download queue on the right.
E4. The next button is for the Your User Profile (My YT Account).
When logged into
your account and this button is selected, DS4 will open the same dialog window shown previously and
populate ALL of the videos you have uploaded to your profile on the left side of this window.
Thereafter you will be able to select one or more of these videos using your mouse and the buttons
in the middle and move them to the download queue on the right.
 E5. The Favorites menu item in YouTube has changed. When older
accounts were created a “Favorites” category was automatically created in your account. However, in
newer accounts this is not the case. The Favorites option has been demoted to nothing more than a
playlist. So, if you can’t find a left-hand menu item called Favorites, you can create one by
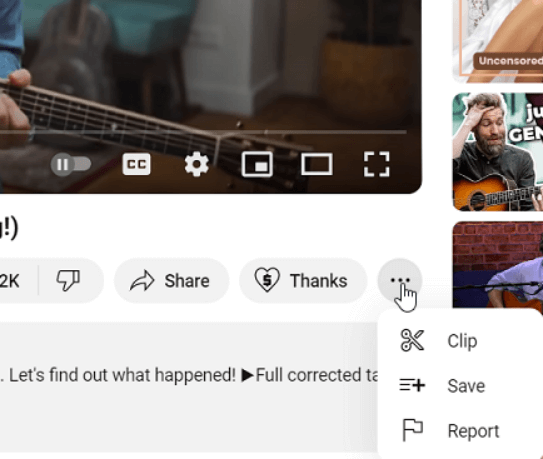
opening any video and then on the right hand side below the video frame, clicking on the three dots.
You will then see some options including the “Save” option. Select this and when prompted type the
word Favorites and save it and then you’ll see the Favorites label appear in your left-hand page
menu in your Youtube account.
E5. The Favorites menu item in YouTube has changed. When older
accounts were created a “Favorites” category was automatically created in your account. However, in
newer accounts this is not the case. The Favorites option has been demoted to nothing more than a
playlist. So, if you can’t find a left-hand menu item called Favorites, you can create one by
opening any video and then on the right hand side below the video frame, clicking on the three dots.
You will then see some options including the “Save” option. Select this and when prompted type the
word Favorites and save it and then you’ll see the Favorites label appear in your left-hand page
menu in your Youtube account.
E6. Video Clipping This video clipping features allows you to save ONLY the segment of a video you are interested in.
For example, there may be a 5:00 video that contains a segment of 27 seconds you’d like to have… but
you don’t need or want the entire 5 minute video. This new clipping feature will allow you to do
exactly that. e by opening any video and then on the right hand side below the video frame.
This video clipping features allows you to save ONLY the segment of a video you are interested in.
For example, there may be a 5:00 video that contains a segment of 27 seconds you’d like to have… but
you don’t need or want the entire 5 minute video. This new clipping feature will allow you to do
exactly that. e by opening any video and then on the right hand side below the video frame.
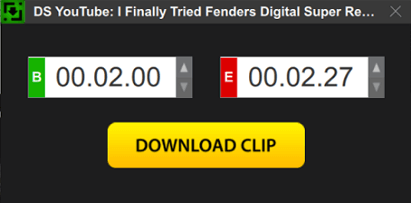 To use this feature first note the beginning and ending time of the clip of interest within the
video, when it is open on your screen. After that click this Clipping Button and the following
dialog window will open. Next, click into the form fields and insert the time that designates the
segment of interest. After that, click the orange, Download Clip button and DS4 will download the
video and cut it, saving the segment of interest and then delete the rest.
To use this feature first note the beginning and ending time of the clip of interest within the
video, when it is open on your screen. After that click this Clipping Button and the following
dialog window will open. Next, click into the form fields and insert the time that designates the
segment of interest. After that, click the orange, Download Clip button and DS4 will download the
video and cut it, saving the segment of interest and then delete the rest.
 E7. On the far right-side the last YT Button is Any User Account
function. When you are browsing a YT User Account or Profile and then click this button, DS4 will
parse the account for this user and it will gather a listing of ALL PUBLIC videos, and place them in
the dialog window used in several of the other YT functions and again shown here below for one last
time.
E7. On the far right-side the last YT Button is Any User Account
function. When you are browsing a YT User Account or Profile and then click this button, DS4 will
parse the account for this user and it will gather a listing of ALL PUBLIC videos, and place them in
the dialog window used in several of the other YT functions and again shown here below for one last
time.
As instructed previously, select those videos on the left that you want to download, move them to the right using the arrow keys, and then click the yellow or green buttons to download and save either the audio only or the video.
2. Sniffer Downloading Module
When trying to download an A/V file from sites other than YouTube, The Sniffer Module should be used. It is a broad-based downloading module that should work on most sites with audio or video files.
The Sniffer Module employs the new “browser” approach to downloading. This not only broadens its detection and downloading capability but also, is easier to use that the old design found in Version 3.
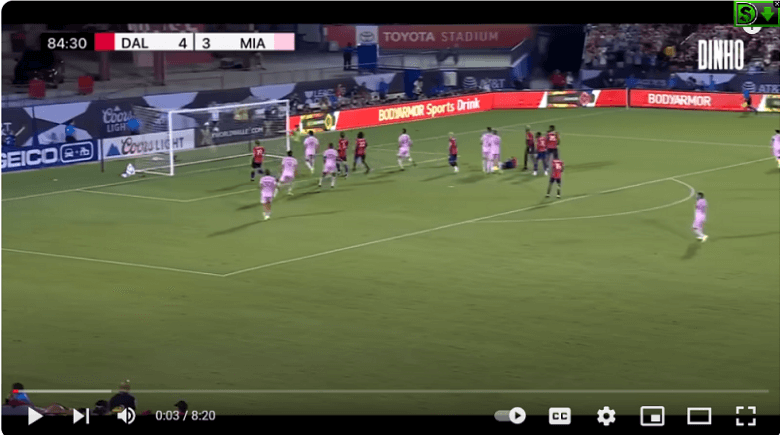
Like the YT modules discussed above, the workflow is the same. Start by typing a URL or pasting a URL of interest in the Sniffer browser. Once that page loads, click a video of interest and start it playing. Once the video starts to play, DS4 will place a small green graphic on the upper, right hand side of the video as shown below.
Once this graphic is clicked a dialog window will open as shown below. At the top of the dialog in the green area, from left to right you will see the 1) Video Name, 2) Duration, 3) Download Later, and 4) Tools menu. Depending upon the site, it is also possible that some of this data may not be available to DS4 and therefore will not be displayed
In the black body, you will see a list of the files available to download with specific details for each: File type, resolution, and file size.
Note About Web Pages With Audio Files
Unlike video files that they are displayed in a specific location on a page (in a video frame or player), audio files are not. This means that the green Download Button cannot always be located or found near the audio file being played, like it is with a video.
On a page with embedded audio files, the DS4 green download button may be located near the audio files but it also may be located in the top right-hand corner of the page, and potentially even in other locations on the page. That is okay. What you need to understand is that, regardless of where it is located, once you START an audio file playing, the sniffer module will detect the audio playing, and the green download button when clicked will allow you to download the audio that is playing or was last played.
A. How To Download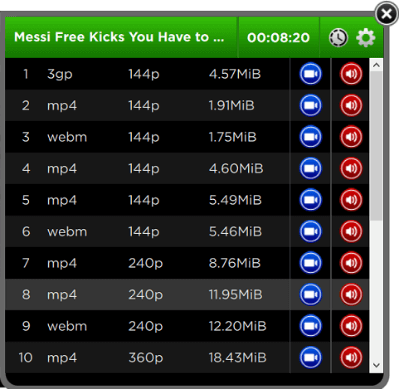 There are several different options for downloading from this dialog window.
Click the blue video icon for a specific file. When you do that video will be downloaded immediately and saved in the default file location for DS4 files on your computer. It will save the file in the same file format, and with the video file name shown in this meta data window for this file.
A second way is to click the Red Audio button. When you do this, video will be downloaded immediately and saved in the default file location for DS4 files on your computer. It will save the video file, strip the audio from it, delete the video file and then convert the audio stream to an mp3 and save it with the video file name shown for this file. The default audio file format can be changes in the Options button of the program.
 A third way this can be download is to click the clock icon, in the upper right-hand corner which
toggles on the “Download Later” option. Once that is on then clicking the blue, video or red, audio
button will place that file in the que to be download at a later time. See the Download Later section of
this User Guide for more details on the Download Later feature
A third way this can be download is to click the clock icon, in the upper right-hand corner which
toggles on the “Download Later” option. Once that is on then clicking the blue, video or red, audio
button will place that file in the que to be download at a later time. See the Download Later section of
this User Guide for more details on the Download Later feature
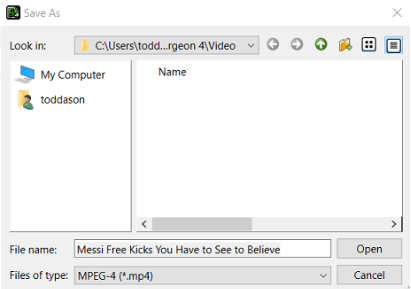
The final way to download is to click and select a row in the black body. When you do, that row will be highlighted to show it is selected. After that, the next step is to again click either the Red or Blue, audio or video button on the right. This time, DS4 will open a standard Windows Dialog box from which you can modify the file name, the file type, and the download location.
B. Download Progress Dialog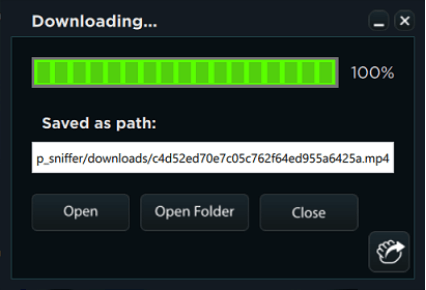 Once the download begins DS4 will show the following Download Progress dialog window.
Note that in this window you can see the path and the file name.
Also note at the bottom, once downloading is completed that you can click:
Open: This will open the file in your default application for the file type being downloaded, or if you have selected 1 of 3 TMJ Software programs (SS, VS, KS), in the Options Button, it will open the file in that program when clicked.
Open Folder: This will open the folder on your computer which contains the file you have just downloaded.
Drag and Drop Icon: Also note the Drag/Drop graphic on the far, lower right. This can be clicked with the mouse and held down and then dragged to a different folder or location, or onto an application that is open on your machine – which will then open this file in that program.
C. Sniffer Module Buttons and Alternative URL Download Address Bar

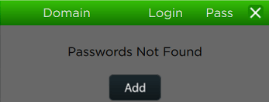
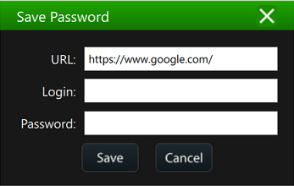
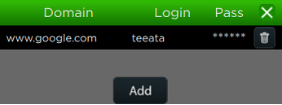
On the far right side of the Sniffer Module there are several buttons. Beginning on the left side of this group and working right, we see the following: Star - The start button is used to Favorite a site/page when that page is loaded and open in the Sniffer browser. Blue Heart List - When clicked this button will open a list of sites that you have selected as “Favorites” and you can select one to load in the browser. Red X Can - This is a Delete Cookies/Cache button. It will delete all cookies/cache from the browser. PW Button - This button allows users to save credentials for a site. When you click this button you will see the image on the left. From there, clicking the add button will open the center image below. Here the URL, Login and Password data is entered and Saved. If you have previously saved credentials for a site and click the PW icon, it will open the window in the right image below, where you can see the site(s) for which you have saved credentials. From this list if you click the Login field, the login ID will be copied to your clipboard and then can be pasted into a login dialog for the site. Clicking in the password field will copy the PW to your clipboard so you can use it.
 The Link (Chain) Icon - If you encounter a site where the Sniffer’s detection system was not be able to
find the URL for a and display the Green Download Icon….but the URL to that file is visible on the page,
this alternative system allows you to paste the URL into this form field and then click the GO button.
This alternative approach will try to find the A/V file and allow you download it.
The Link (Chain) Icon - If you encounter a site where the Sniffer’s detection system was not be able to
find the URL for a and display the Green Download Icon….but the URL to that file is visible on the page,
this alternative system allows you to paste the URL into this form field and then click the GO button.
This alternative approach will try to find the A/V file and allow you download it.
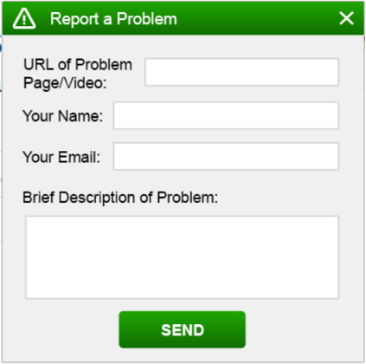 Triangle Button - The Triangle with the Exclamation Point is a “Report a Problem”
button. This button is
to be used to report when you encounter an A/V file on a page that the sniffer module cannot find or
download. When this button is clicked it will open a form that looks like this.
Triangle Button - The Triangle with the Exclamation Point is a “Report a Problem”
button. This button is
to be used to report when you encounter an A/V file on a page that the sniffer module cannot find or
download. When this button is clicked it will open a form that looks like this.
The top URL field will automatically be populated. Enter your name and email and a brief description of the issue and click the submit button.
This is ONLY for reporting a page or A/V file that cannot be detected ore downloaded. It is NOT the Help Desk and WILL NOT be responded to. If you need Tech Support you must use the Help Desk.
D. Download Later Functionality
Version 4 of Download Surgeon has a new, Download Later, feature. This allows users to browse and select
A/V files for downloading at a future specified time.
This DL functionality is built into the file dialog window which appears whenever DS4 detects a file. An example is shown below. By default DS4 downloads files immediately but, if the Clock button is click it changes colors and DL Later is active until you again turn it off.
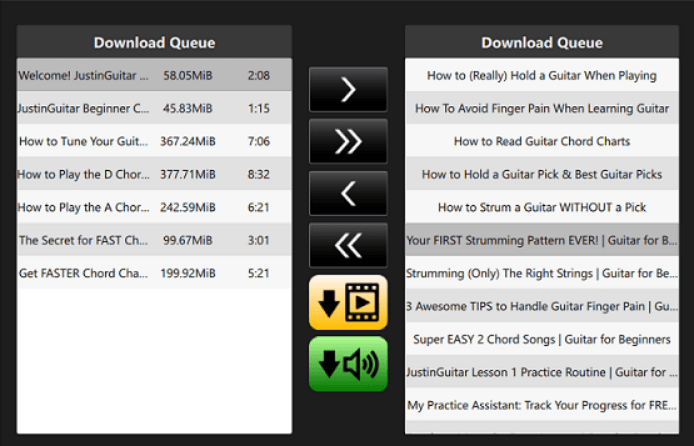
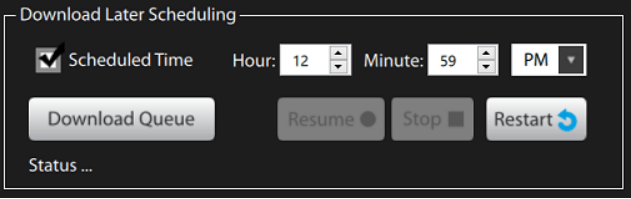
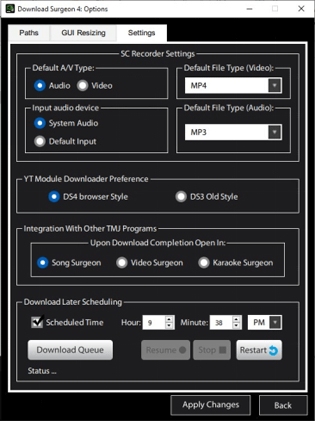
Once activated any files you select for downloading go into a Queue for downloading later. This queue can be found in the Options Button >> Settings and is shown below. Here you specify the time that the files in your queue are to be downloaded. Files will be downloaded automatically, daily, at the specified time.
Below the specified time fields, there are some additional buttons. These become active ONCE the Download Later queue is being processed. The allow you to Stop the downloading, and then again resume it.
The Download Later functionality runs in the background from the system tray, even when DS4 is closed. If you close the system tray icon for Download Later, this function will not work. The “Restart” button below, restarts this system by again loading it into the system tray.
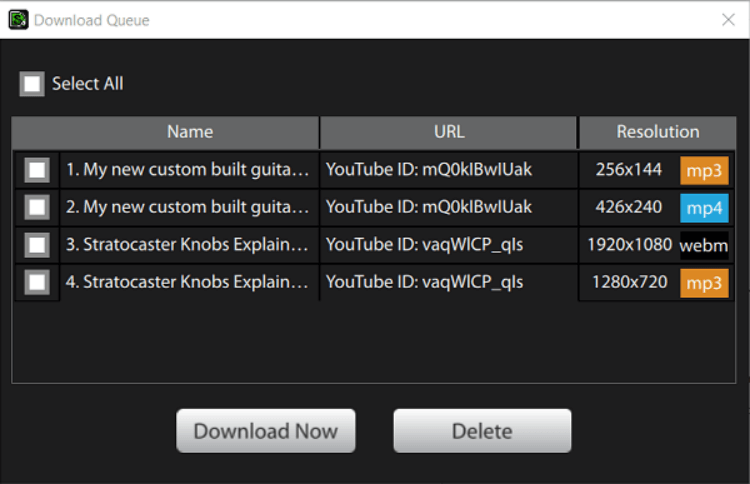
Clicking the Download Queue opens a list of all the files you have added to the queue as shown here. Not only can you see the files, but you can select one or more of them if you want to download them immediately, rather than waiting for the specified automatic “Download Later” time.
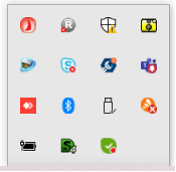
Lastly, please note that for this Download Later feature to run a separate system tray application must be running. When you first open DS4, this system tray application will open and run. You can see it in the graphic below. This system tray application will continue to run, even when DS4 is closed, if you have file in the Download Later queue for downloading.
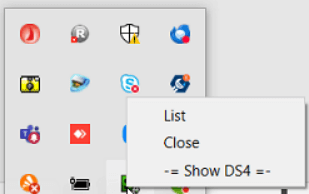
If you right click the DS4 system tray icon, you will see three options. The first “List” will show you a list of the files in the DL queue. Close will close this system tray application. Selecting this option stops the DL system and no files will be downloaded. The last option “Show DS4” will move the DS4 UI on-top, in front of any other applications that you may be running.
3. The SC Recorder
 The SC Recorder is a digital recorder. It can record anything played (audio or video) on your computer
screen. The SC Recorder should be used as a last resort module for the grabbing of files. Since it is a
digital recorder, the quality is very good but its major drawback is time. If a video is 3 minutes long
it will take 3 minutes to record it. If it is 40 minutes, it will take 40 minutes. This is in contrast
to a downloader where the time download a 10 minute video with a high speed connection might be 30
seconds.
The SC Recorder is a digital recorder. It can record anything played (audio or video) on your computer
screen. The SC Recorder should be used as a last resort module for the grabbing of files. Since it is a
digital recorder, the quality is very good but its major drawback is time. If a video is 3 minutes long
it will take 3 minutes to record it. If it is 40 minutes, it will take 40 minutes. This is in contrast
to a downloader where the time download a 10 minute video with a high speed connection might be 30
seconds.
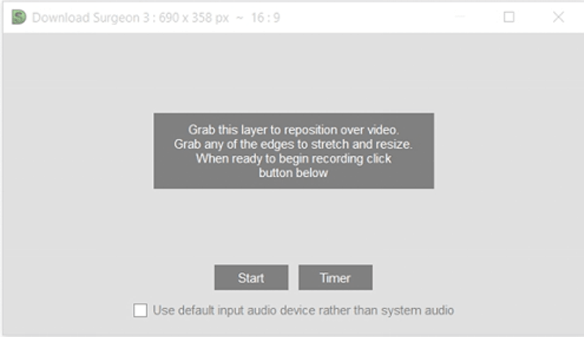
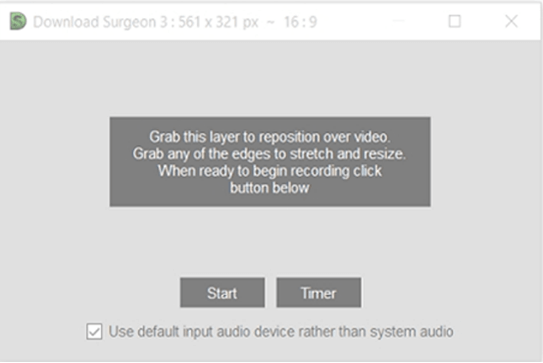
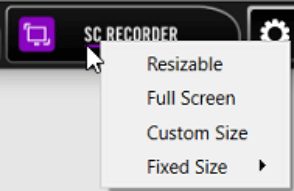 When you click the SC Recorder button you will see a small dropdown window with several choices. Select
the one that is most appropriate for your work. When you do, you’ll see a transparent layer open on the
screen that looks like this.
When you click the SC Recorder button you will see a small dropdown window with several choices. Select
the one that is most appropriate for your work. When you do, you’ll see a transparent layer open on the
screen that looks like this.
Using your mouse grab this layer and move and resize it to fit over top the area of your screen that you wish to record. For example, if you are recording a video, place it over the video and resize it by stretching it horizontally and vertically to completely cover the video.
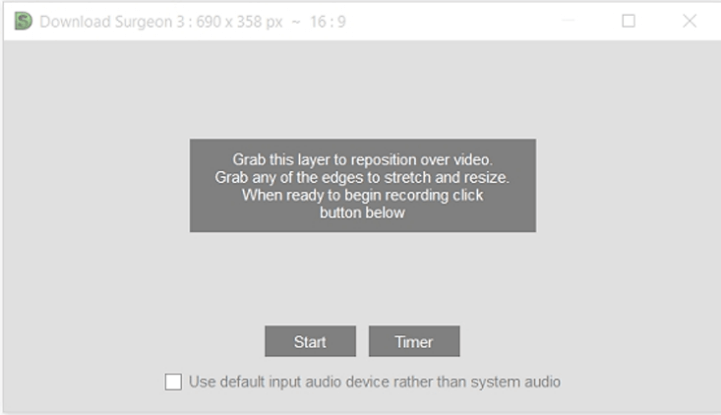
If you are only interested in recording audio, it can be placed anywhere on the screen and it can be of any size. Make sure when you position it, it is ENTIRELY on the screen and not partially pushed off the screen to one side or the other.
You next step is to select the Start or Timer button. We’ll discuss the check box below these two buttons, “using the default input audio”, in a couple of paragraphs.
If you want the SC Recorder to automatically Start and Stop the recording select the Timer button. If you’d like to record in the present moment then the Start button should be selected.
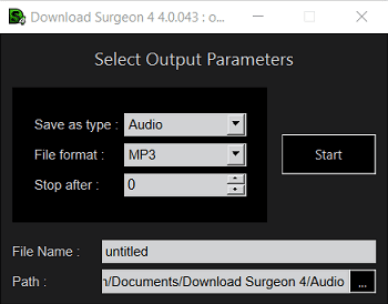
After clicking the Start button this dialog window appears. Select video or audio. Next select the file format you’d like it to be saved in. Lastly, you can specify a length of time to record in the “Stop After” field or, if you leave at the default zero, it will record until you manually stop it.
Below that, type in a file name to replace the default “untitled” label. Lastly, if appropriate, you can override the default path the file will be saved in by clicking the black button with 3 dots on it and selecting a different folder.
Once you have set the parameters in this dialog window, AND you have previously placed the transparent layer over the area to be recorded the SC Recorder will start recording once you click the “Start” button.
Remember to start the video or audio playing, once you have started the SC Recorder.
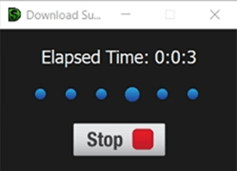
Once you click the Start button DS4 will display a small dialog with the elapsed time and a Stop
button.
Once you have finished recording, click the Stop button and the SC Recorder will stop and save this
recording
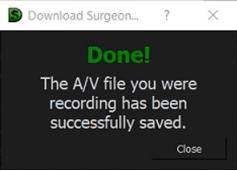
If you are recording a video using an mp4 format, the SC Recorder will finish immediately. If you designated a different file format in the Setup screen, then DS4 will convert the recorded mp4 file into your selected file format. When it is done recording and converting you will see the following window.
A. Using The Timed Recording Option
Next, let’s return to the transparent layer window and select the “Timer Button” and review this set up.
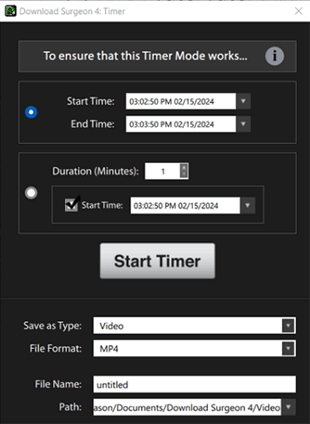
After clicking the “Timer” button you will see this set up window. This screen has many of the same fields as the regular set up screen we’ve just reviewed. These include the file type, file format, file name, and path. After designating these settings the remaining work is to select a start and ending time for the recording.
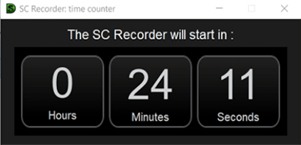 Once you have set these times, click the Start Timer button and you’ll see the following window. It
tells you WHEN the timed recording will start.
Once you have set these times, click the Start Timer button and you’ll see the following window. It
tells you WHEN the timed recording will start.
You can park this window on your screen out of the way, or you can minimize it and put it in your task bar.
 To make sure this scheduled recording is NOT interrupted, please make sure your computer does not go
into screen saver, sleep, or hibernation mode.
To make sure this scheduled recording is NOT interrupted, please make sure your computer does not go
into screen saver, sleep, or hibernation mode.
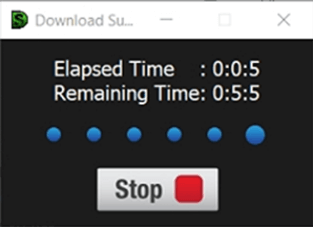
Once the Timed Recording starts it will display the following recording window. This window allows you to see the elapsed time of your recording and the remaining time that is yet to be recorded.
There is a Stop button that allows you to manually stop the recording, but the purpose of the Timer is to have the recording automatically start and stop.
One the Timed Recording has finished it will pop up the following message telling you it has finished.
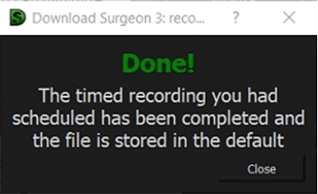 B. One the Timed Recording has finished it will pop up the following message
telling you it has finished.
B. One the Timed Recording has finished it will pop up the following message
telling you it has finished.
B1. While you can use your computer to do other things BEFORE the recording STARTS, you must return the video player or the web page with the video on it, to the same position or location on your screen, as it was when you set up the recording so that the SC Recorder will be able to recorder the correct area you designated.
B2. You cannot use your computer to do other things while it is recording unless you have more than one monitor.
B3. If you have more than one monitor, DS4 will run on the default monitor (Designated as monitor 1). You can set up and run the SC Recorder on monitor 1 and then switch monitors and do other work on other monitor(s).
B4. Screen savers and sleep modes will interfere with the SC Timed Recorder. Please make sure you disable these.
C. The SC Recorder as a Screen Narration Tool
 Now let’s return to the transparent layer one last time and discuss the option contained in the checkbox
which is to “Use the default audio input, rather than your system audio.”
Now let’s return to the transparent layer one last time and discuss the option contained in the checkbox
which is to “Use the default audio input, rather than your system audio.”
By default, the SC Recorder captures your system audio. That means that whatever is played, seen, or heard on your computer system is what it records. However, when you select this checkbox, the SC Recorder switches from using system audio and instead uses your computer’s default audio input device. This default device is the one that is selected in your audio system properties. On a newer machine this is most often going to be a built-in microphone.
By selecting this option, a user is able to record their voice through a microphone, thereby allowing them to use the SC Recorder module as a screen narration tool. For this use, you’ll likely be recording in real time, so you’ll be choosing the START button not the TIMER button. With this setting selected and running you will be able to talk and narrate whatever you’d like on your screen.
4. The Options Button/The Help Button
The Options button (the cog wheel) will allow you to modify the default paths for saving audio and video files you download. You may set a separate path for audio and video, or set the same path for each option.

Clicking the buttons on the far right of the UI will reveal two Options. One is for Help and the other is for Options.
A. The Help button allows quick access to a number of items. These are:
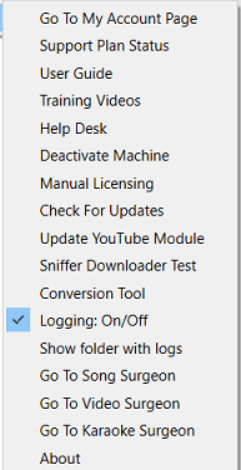
Go To My Account Page – This link to your My Account page for DS4 where you are able to login and manage your information.
Support Plan Status – This again links to your My Account page where, once logged in, you can see your Support Plan status
User Guide – This is a link to the document you are now reading, which provides an overview of the program, features and functions.
Training Videos – This link goes to a page on our website where you can view training videos and tutorials for Download Surgeon
Help Desk – This link goes to our full service Help Desk. If you have problems or questions, this is the first place you should start.
Deactivate Machine – This option will remove the license from the current machine which will make it available for a different machine.
Check For Updates – This option checks to see if there are any DS4 updates available and if there are it will prompt you to download and install them.
Update of YouTube Module: This is a separate updater that sometimes must be run manually to keep DS4’s YT Module running correctly.
Conversion Tool - This is a built in tool that converts from one file format to another.
Logging On/Off - This option is turned off by default. When selected, a checkbox will appear next to this selection indicating it is On.
Show Folder With Logs – Selecting this option will open DS4’s logging folder where any logs generated by the program are stored.
Go To Song Surgeon – This option takes you to the Song Surgeon website. Song Surgeon is our best-in-class audio slow downer.
Go To Video Surgeon - This option takes you to the Video Surgeon website. Video Surgeon is a video analysis tool focused on the consumer market.
Go To Karaoke Surgeon - This option takes you to the Karaoke Surgeon website. Karaoke Surgeon is a 5 in 1 tool for Karaoke Musicians and Enthusiasts.
About – This selection opens a window that gives you a variety of information including the version of the software you have installed and running on your machine
 B. The Options selection contains the following three tabs.
“Paths” which allows you to change the default paths.
A GUI Resizing tab which allow users to select a value smaller or greater than one, and by doing so will decrease or increase the size of the main Download Surgeon interface.
Settings - The settings tab contains a number of default settings for DS4 that customize how the program will work on your computer. These include default file types, integration with other TMJ Software product and the controls for the Download Later functionality.
5. Keyboard Shortcuts
The following keyboard shortcuts may be used to operate Download Surgeon. For them to work correctly DS4 must have focus on your screen. To give DS4 focus simply click on the UI.
| Control + Y | - | Open YT Module |
| Control + S | - | Open the Sniffer Module |
| Control + R | - | Open the SC Recorder |
| Control + L | - | Turn Logging On/Off (message appears on screen) |
| Control + H | - | Opens Help Menu |
| Control + O | - | Opens Options Menu |